Composting Toilets
A composting toilet treats sewage onsite, recycling nutrients into fertiliser that you can use it on the garden. There are many types of composting toilet, from expensive proprietary systems to simple self-build designs. Keeping urine separate is usually the key to successful composting, otherwise it can become anaerobic and smelly.
A composting toilet is a good option where there’s a limited water supply, because it needs no water for flushing. On a completely water-free site, you could use alcohol gel for hand cleansing, but otherwise you’ll need handwashing facilities.
One important thing for a low-impact toilet is to keep electricity use low. A small amount of energy just to run a fan is necessary and OK for more compact models. However, we would not recommend dry toilets that use electrical elements to heat the compost.
In general, successful composting toilets need sufficient space to allow the compost to sit for at least a year – perhaps more. This will be either in chambers below the seat, or containers that can be removed and left elsewhere to compost completely.
The composting process
The excreta falls into a composting chamber directly beneath the toilet pedestal. Naturally occurring bacteria, fungi, worms and other organisms will thrive on this organic matter and break it down into humus. The use of an appropriate ‘soak’ material is necessary (see below for more), as is controlling moisture through urine separation and ventilation.
Human excreta can contain pathogenic bacteria, viruses and protozoa, and may be dangerous to human health. Composting kills these human pathogens and the finished compost is safe and free from odour. The compost, usually removed once per year, is an excellent soil conditioner ideal for use on ornamental flowers and shrubs.
Twin chamber composting
A reliable and robust approach for the UK climate is to alternate annually between two separate chambers. The active chamber fills with excreta and soak over the course of the first year. When it reaches capacity the pedestal is moved across to the resting chamber for the second year. The contents of the first chamber then have a full year to compost with no fresh additions.
By the end of the second year the contents of the original chamber are fully composted and can safely be removed. To continue the cycle the pedestal is moved back above the empty chamber while the other matures. This batch processing means there is no contamination of mature compost with fresh faeces.
Starting a new chamber
With an enclosed toilet chamber or container it’s a good idea to start off a new empty chamber by adding a spadeful of compost and perhaps some additional worms. These should be brandling worms, which are common in gardens (also sold as fishing tackle).
For a batch composting system (when you are switching between chambers every year or so) you can ‘seed’ a new chamber using a small amount of the compost from the chamber being left to rest.
In a continuous system (without any switching to new chambers or containers), then once this has got going the ecosystem should settle down. Then no intervention, in terms of adding worms or other decomposers, should be necessary. A system like this should settle down within a few months.
If your collected waste does not seem to be decomposing well, try adding a shovel of well-composted garden compost, or a few brandling worms. Many decomposing organisms, such as bacteria and fungi, should find their way in anyway.
Venting the Chamber
Appropriate ventilation is essential for effective composting and for preventing bad smells. Design the vent to draw air across the top of the chamber, to promote the compost process. It should also draw air from inside the toilet cubicle, down the toilet pedestal. Passive ventilation is possible with careful design. Alternatively, a low wattage fan gives excellent results and costs only a few pounds per year to run.
To avoid bad odours it’s essential to stop air being blown up into the cubicle from the chamber. This problem can occur in inadequately designed toilets on windy days. You’ll need a properly sealed compost chamber, so it may be wise to seek detailed advice from a competent installer.
Soak
You’ll usually need to add a ‘soak’ material to the composting chamber to aid the decomposition process. In our experience, wood-shavings work very well. Conventional wisdom is to add soak after every toilet use (as an alternative to the flushing ritual). You should add only just enough soak as is necessary in order to keep the chamber size as small as possible.
In a public toilet, people not used to composting toilets may put too much soak down a toilet. This affects the composting process whilst the cubical can also become scruffy, with sawdust scattered about. Our experience at CAT is that a daily or even weekly addition of soak by ‘the operator’ may be better than leaving users to add it indiscriminately.
Fly control
Keeping the compost fairly dry, for example with urine separation, will minimise the risk of a fly infestation. A well-sealed chamber and a protected vent should stop flies entering. Flies inside the chamber can be attracted to a dedicated fly-trap or to the light shining down a vent pipe, becoming trapped at the fly screen at the top. See the related question below for more on fly control.
Urine separation
For effective odour-free composting in the UK climate it is essential to divert the urine from the compost chamber. Urine separating toilet pedestals are available that intercept urine on a metal plate and divert it to a drain. Separation only works when users are sitting down. Because men often won’t sit to pee unless forced to, it may be worthwhile installing a separate urinal (which can be waterless). This could lead to the same drain, or to collection for re-use as fertiliser.
Urine separation systems can be self-built, but proprietary urine-separating seats or pedestals are available. Urine could then be either collected for use as fertilser or piped to a soakaway outside the building. A typical soakaway could be 4 meters long, 500mm wide, 500mm deep and filled with rubble or large (40-50mm) stone.
Maintenance and emptying
Once per week the toilet operator needs to open the access hatch and inspect the compost chamber. They should add an appropriate quantity of soak if necessary . If there’s a large ‘peak’ accumulating under the pedestal they should level it by raking forward.
Emptying the composting may be an annual procedure. For a completely odour-free toilet the access hatch can be situated inside the toilet cubicles because this protects against smells from back-drafts. However, this can make removing compost slightly more awkward than with access hatches on the outside of the building.
Further Information
See the related questions below for further detail. For in-depth advice we run regular courses on composting toilets.
Related Questions
How do I get planning permission for a composting toilet?Composting toilets are mentioned in part G of the Building Regulations. The conditions given there are that they’re fine when: “Suitable arrangements can be made for the disposal of the waste either on or off the site; and the waste can be removed from the premises without carrying it through any living space or food preparation areas (including a kitchen); and no part of the installation would be installed in any places where it might be rendered ineffective by the entry of flood water.”
It also says: “Composting toilets should not be connected to an energy source other than for purposes of ventilation or sustaining the composting process.” Beyond that, other details will apply, such as having adequate handwashing and other sensible hygienic procedures.
It is certainly important to site toilets as far as possible away from water supplies to avoid contamination. Exact distances necessary depend upon the type of soil. Fissures in the bedrock can allow effluent to travel a long way and sewage and water should be at least 15 metres apart. If the soil is sandy this could be reduced to 7.5m. Where possible toilets should be downhill of wells or boreholes. The bottom of the latrine chamber should be 1.5 metres above the water table.
Public health is important, and public authorities are right to be concerned about toilet systems – it’s part of their job. Generally if you are planning anything unusual you should let them know, and indeed, seek their advice. The relevant agencies – the Planning Department of the Local Authority, the Building Regulations Officer, the Environmental Health officer and the Environment Agency (or SEPA in Scotland) might or might not be familiar with what you are proposing, but it best to explain everything as fully and openly as you can. Usually they are sympathetic and helpful. They cannot stop you using an unusual system if it does not cause a nuisance, threaten public health or damage the environment.
Various kinds of flies can breed in the chamber of a composting toilet, and come out through the seat into the room. You may get fruit flies if vegetable wastes are put into the toilet, and you may also get fungus gnats – which are like midges but do not bite. it is unlikely that any of these flies pose a health hazard, and if they stay in the composting chamber they are a useful part of the decomposing process. Out in the room however they are irritating and cosmetically unpleasant.
With a well-functioning vent there are no smells in the room to attract the attention of flies, especially if the toilet lid fits well. But it is likely that colonies of flies will establish themselves from time to time, so it is well to be prepared.
Most flies move naturally towards a light source in a dark space. This means that if the lid does not fit well (to close out light), any flies will be in the pedestal area waiting for their chance to come out. For this reason it is not a good idea to have a layout in the room such that direct sunlight comes through the windows and falls onto the seat at any time of day. However, the attraction of flies to a light source can be used to draw them away from the pedestal.
The simplest method is to use the vent, especially in passively vented systems. Ideally, the vent should run vertically upwards from the chamber so that light at the top can be clearly seen at the bottom. Place a metal gauze over the top of the vent to prevent other insects coming in at night, attracted by the smell. Flies then fly up the vent pipe and are trapped at the top; generally a few spiders will be on hand to take advantage of this supply of food, which is a useful arrangement (although you’ll need to clean cobwebs away perhaps once a year to keep it fairly clear).
If the vent cannot be used, an alternative is a simple fly trap made out of a jam jar – particularly suitable on wooden pedestals. For this, drill a 2-3mm diameter hole in the middle of the jar lid, and screw the lid down over a hole in the top of the chamber. The jar is screwed upside down into the lid, with a cone of clear plastic in the lid to help funnel the flies up. Attracted by the light, flies will gather in the jar – which can be emptied as required.
If all else fails and flies are a persistent problem, then whilst an insecticidal strip hung inside the chamber might not sound very ecological, it will control flying insects without affecting the other decomposers in the compost mass.
This advice is taken from the CAT book ‘Lifting the Lid’, by Louise Halestrap & Peter Harper. The book was published some time ago and is now out of print, but the advice is still sound.
If there’s no mains electricity onsite, it may be possible to supply lighting using solar and/or wind power. Using low voltage (12 or 24 volt DC) will reduce equipment costs when off-grid. To minimise power demand, use a motion detector to only turn the lights on when a person enters.
A suitably sized photovoltaic panel on the roof of the building can be coupled with a battery to supply sufficient energy for lighting during the summer months, but would be inadequate in winter. Year-round power can be supplied by combining a photovoltaic panel on the south facing roof of the building with a wind turbine mounted nearby on a mast.
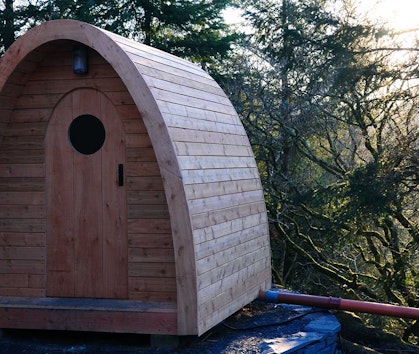
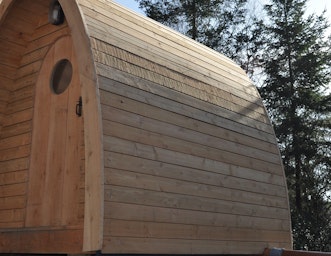
There is considerable scope for creativity in the design of a standalone toilet cubicle, for example on an allotment. Timber frame structures are popular and attractive. For a robust and vandal-proof loo you might consider a metal clad unit.
An Aquatron separates solids and liquids using the sticking properties of liquid. In the hourglass-shaped device liquids stick to the sides while solids fall down the centre into a composting chamber.
It must be less than 25 metres (ideally less than 15 metres) from the toilet, in order that solids and liquids have not become too mixed. You should try to avoid bends in the pipe, and the waste should enter the aquatron at an angle of roughly five degrees.
A composting chamber may need to be about one-third to one half of a cubic metre per person. That volume is equal to a box about 70 to 80 cm on each side. The larger the chamber, the more forgiving the system. You may need to have provision for drainage of the compost, as more liquid is likely to get through than with a urine seperating toilet. So you’d need to include this in the design and allow for pipes, etc.
Ventilation will reduce problems with bad odours and flies and help prevent saturation of compost mass. A simple unpowered (passive) vent is a straight pipe of at least 110mm diameter, reaching well above the roof line and with a rotating cowl. If you paint the top of the pipe black this assists with thermal draw. In toilets at CAT we have used a small 10 watt fan in the composting toilet.
Nearly all pathogens are broken down by composting if it’s left for at least a year (ideally two) to decompose. The quantity produced is small so as an extra precaution it can just be used where it doesn’t come into direct contact with the edible part of crops.
For more on the Aquatron, see the websites of either the UK distributor or the Swedish manufacturer.
Urine can be used as a fertiliser (on non-food plants), when diluted about 1:10 in water. It is an excellent plant food containing just the right balance of plant nutrients including nitrogen, phosphorus, and potassium. However, don’t store it for too long or it will start to smell. In some cases, diluting with waste greywater may be possible.
Both flushing and composting toilets can have urine diversion. It’s common for composting toilets as diverting urine at source improves the composting process. There are waterless urinal designs that may be suitable for some locations. A more basic alternative is just to collect urine in a container with a funnel.
Urine collected without other contamination should ideally be used within a day or so, before ammonia levels build up and it starts to smell. If you are collecting urine from seated use there is a real risk of contamination from faecal pathogens. Urine collected in this way should be stored for six months, during which time the ammonia level will build up and sterilise the liquid.
You should avoid using urine on any crop where the bit that you eat may come in contact with the urine. So it’s fine round your fruit bushes, shrubs and flowers, but not for salad crops.
At CAT we found good results from applying diluted urine as fertiliser in winter and early spring. At these times of year plants often don’t get enough nitrogen from the cold soil.
At other times, adding urine to compost may be a good option. This is particularly appropriate for a high-carbon compost heap, such as leaves & woody waste. The nitrogen input is then very helpful. Another simple idea is a ‘straw bale urinal’. This is a bale of straw, ends uppermost, for men to urinate on – or women too, with a suitable design. The liquid soaks in and composts the middle of the bale in a few months.
Compost Toilets: an introduction
Study at CAT: Our Postgraduate Courses
Related news

The joys of compost toilets
10th October 2019
Eye in the Sky
31st May 2019
Make do and mend
25th May 2019Related Books

Did you know we are a Charity?
If you have found our Free Information Service useful, why not read more about ways you can support CAT, or make a donation.
Email Sign Up
Keep up to date with all the latest activities, events and online resources by signing up to our emails and following us on social media. And if you'd like to get involved and support our work, we'd love to welcome you as a CAT member.

