Airtightness and Ventilation
Airtightness and Ventilation
Reducing heating demand in our homes is one of the most important steps to a zero carbon future. It’s then far easier to install enough renewable energy to meet our remaining needs. Upgrading insulation makes the biggest impact, but air infiltration also causes significant heat loss. Careful attention to airtightness and ventilation is key to keeping heating demand low.
In CAT’s ‘Zero Carbon Britain: Rising to the Climate Emergency’ report we recommend building new homes to the ‘Passivhaus’ standard or similar. That means stringent airtightness and mechanical ventilation with heat recovery (MVHR).
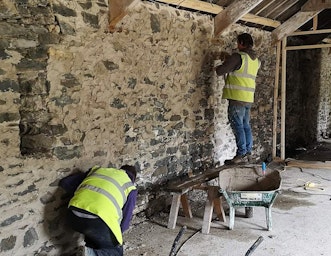
We also recommend a mass refurbishment of existing buildings. If you undertake a whole house retrofit, this may also involve using MVHR. If you’re not able to renovate to the highest level then passive (non-powered) ventilation, or a mixture, might be appropriate.
Unintentional vs intentional ventilation
‘Build tight, ventilate right’ is a long-standing energy efficiency mantra. The aim is to stop unintentional ventilation and instead provide intentional ventilation. Airtightness applies to the entire building fabric: gaps and cracks at the corners and edges where materials join, holes for pipes and cables, where joists penetrate a wall, and so on.
The benefits go beyond energy savings. The right approach to airtightness actually makes a house feel both fresher and more comfortable. People tend to crank up their thermostat in a draughty house to overcome the cooling effect of incoming air flows. In contrast, with low air movement a home remains comfortable at a lower temperature.
With good airtightness, effective ventilation replaces stale air – including carbon dioxide, cooking smells, water vapour, dust, off-gassing (for example from new appliances), and so on. If a building isn’t airtight enough, planned airflows for ventilation won’t work as intended.
In addition to draughts, ‘thermal bypass’ can cause further heat loss. This is when outside air gets past the insulation layer and into spaces within the building fabric. The ‘dot-and-dab’ technique for quickly fitting plasterboard creates voids prone to thermal bypass. It also happens when spaces in a roof or intermediate floor aren’t properly sealed when being insulated. As well as heat loss, these cold patches are at risk from mould growth.
Measuring airtightness
The first step is to know your starting point by having an airtightness test. Then you can set a target for improvement and a strategy to achieve it.
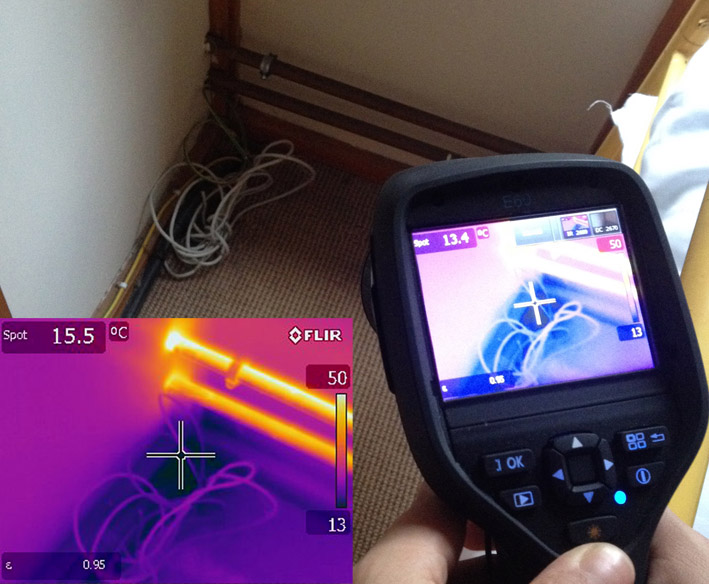
Airtightness in older buildings varies a lot, and you can’t tell just by looking. Using thermal imaging during a test helps to identify heat loss from air leakage, by comparing cold spots visible during the test to those when unpressurised. A local energy agency or community organisation may be able to provide an initial survey.
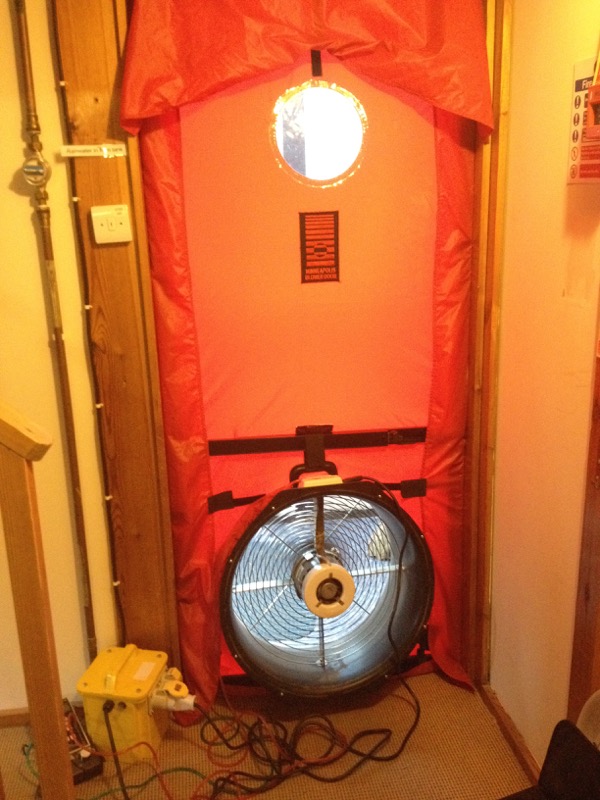
A blower door test shouldn’t be very disruptive or expensive. To carry it out you seal existing ventilation points like extractor fans, trickle vents, and flues. Then a powerful fan extracts air to create a pressure difference that amplifies air infiltration, allowing you to measure non-intentional ventilation. You may want the test to give two measures:
- Air permeability relates to the surface area of a building. It’s used in UK building regulations. The units are cubic metres of air per hour per square metre of surface area: m3/h.m2@50Pa (tested at 50 Pascals pressure).
- Air changes per hour (ach) relates to the volume of a building. It’s used in high standards such as Passivhaus (1ach@50Pa for retrofit) and AECB retrofit (2ach@50Pa).
These could be very different, especially for a less compact layout with a high surface area. When speaking to contractors make sure you’re both talking about the same measure.
Aim and strategy
Once you have a baseline, you can decide on an airtightness target that is practical for your project, considering also the type of ventilation you’ll then need.
A typical modern house probably has an air permeability of about 5m3/h.m2@50Pa. Some older homes are similar, but many are much leakier. Recommendations vary, but for mechanical ventilation to be appropriate you’ll probably want less than half that, and to make heat recovery worthwhile you should target 1.5m3/h.m2@50Pa or less.
To deliver a more exacting target you need an airtightness strategy. This specifies where the airtight layer will be, with details for all the junctions, gaps and holes. When going for a tested standard, set your target to give a bit of margin for error.
Hitting the target
Make sure that the target and strategy are clear to your architect and builders, because effective ventilation depends on it. Attention to detail is vital and therfore you need a good relationship with contractors and they must be fully engaged with the process. As stringent airtightness is new to many in the UK, having a ‘no blame’ culture allows you to get mistakes fixed before it’s too late.
There are special tapes and grommets for sealing junctions and problem areas, such as where electricians and plumbers run pipes and cables out of the building or into an uninsulated loft. Other weak points include recessed lights and the loft hatch. For some older houses secondary glazing might be a less costly option than replacement glazing for getting the required airtightness at window frames.
Ventilation types
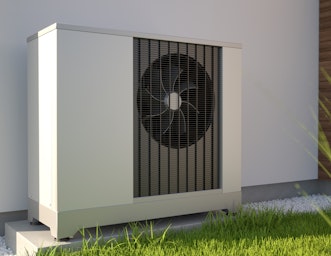
With the best airtightness you’ll need mechanical ventilation with heat recovery (MVHR). This extracts warm stale or moist air, generally from the bathroom and kitchen. A heat exchanger transfers the heat from this to the incoming fresh air for other rooms. MVHR should have very low running costs, saving much more energy than it consumes. However, as a decent Passivhaus-certified system will cost a few thousand pounds, the retrofit must be to a suitable standard to make it worthwhile.
At lower levels of airtightness, simpler mechanical extract ventilation (MEV) may be enough. Instead of heat recovery, fresh air is drawn in through trickle vents or similar. This can use humidistats to regulate air flow. It may be possible to get the same effect without power, through a ‘passive stack’ system. You can supplement a mostly unpowered approach with a small heat recovery fan for the bathroom (perhaps also the kitchen).
Pitfalls
Passive or mechanical ventilation can fail to deliver if there are mistakes in the design or installation or if it’s not maintained – resulting in a stuffy, humid and unhealthy house. A successful approach must work under normal living conditions, for example don’t rely on leaving bedroom doors open.
Poor design or installation of a mechanical system could make it noisy. Large diameter ducts and a low air resistance heat exchanger keep the noise and energy use of fans very low. Rigid ducting is preferable to flexible, which may be easier to install but tends to not perform well. In general, flexible ducts lead to more noise, are harder to clean, and don’t last as long. For heat recovery to work efficiently, the MVHR unit and ducting need to be within the insulation layer, not in an uninsulated loft where they’ll lose heat.
Check the maintenance required to keep a ventilation system efficient and healthy, and that there’s access for this. For example, with an MVHR system you’ll need to check the filters every few months and clean or replace as necessary. Replacement paper filters might cost £10 to £15. You may need a more thorough servicing and cleaning of the heat exchanger and fans every few years.
Contacts and further information
CAT offers short courses including the long-running eco-refurbishment course, which will include more about airtightness and ventilation options. See also this blog post about eco-refurbishments by our course tutor, Nick Parsons.
You can use the ATTMA listings (the Air Tightness Testing and Measurement Association) to find a local air tightness testing company. They may also be members of the others bodies mentioned below.
To find someone to oversee a retrofit project, see the AECB member listings or the Passivhaus Trust (with EnerPHit for retrofits). The AECB and Passivhaus Trust list professionals trained to high standards for both new build and renovation. Another listing site for finding eco-builders is the Green Register. Or you could try the listings of the Government’s TrustMark scheme, which now covers professionals that carry out energy efficiency work including retrofits.
Getting good advice upfront should give big savings later. Local community-based organisations are ideal as trusted intermediaries – bringing together householders and local tradespeople, and supporting both. At the moment, there are organisations like this dotted around the UK, with more gradually springing up.
Related Questions
What draught-proofing measures should I take?For basic measures, checking around the house on a windy day is a good way to locate draughts. You must not block intentional vents such as wall vents (especially for rooms with a fire or stove), trickle vents on windows, and underfloor airbricks.
Wiper and compression seals are readily available for use on opening windows, external door frames and loft hatch. Foam types are cheaper but tend to wear out more quickly. Draught-proofing strips come in many types and thicknesses – so to choose the right one you need good measurements of the gaps you need to fill.
At the bottom of external doors you could add a batten along the bottom with a rubber flange or a strip of brushing. Internal doors to unheated rooms could have the same – or just use a draught-excluder.
Sash windows can be tricky – a brush seal may work, but some sort of secondary glazing will be better. See our page on windows for more.
Thick, well-fitting curtains will greatly reduce night-time heat loss from windows. Make sure curtains finish on a shelf above a radiator rather than hanging in front.
For letterboxes and old-fashioned keyholes you can buy special cover. Either board up and insulate an unused fireplace, or add a ‘chimney balloon’ if you’re planning to use the chimney in future.
For the gaps at skirting boards, between floorboards and around service ducts you can use a filler or sealant. Check that the type of filler (e.g. mastic or caulk) is suitable for the surfaces.
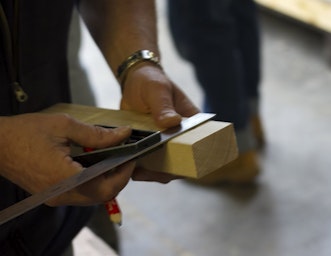
For big gaps you could wedge in wooden beading or round dowels. You can trim this to shape (using a surform or other tool) and tap into position using a dab of wood glue. The added wood could be stained to match surrounding timber.
A more in-depth approach to air-tightness would involve a full test with blower door equipment. As well as measuring heat loss more precisely, this helps identify the less obvious draughts through the building fabric.
This can be a confusing term for two reasons. Firstly because it refers to moisture not air and secondly because the exact physical processes which go on in a building are complicated (and still being researched). However the metaphor of breathing captures the important idea of continual movement. Moisture in itself might not matter, as long as it doesn’t take up permanent residence in your walls.
Broadly, breathability is the ability to buffer moisture – to soak it up and then release it – thus avoiding a situation where water vapour is retained by the fabric of a building. The technical term for this property is hygroscopic. Natural materials tend to be more hygroscopic than synthetic ones. The term “vapour permeable” also gets used in this context, referring to materials that allow water vapour to pass through at a certain rate.
A breathable construction will be made up of a gradation of vapour permeable materials, with the materials towards the inside being less vapour permeable than the materials towards the outside. A rule of thumb is that the material on the inside (warm side) should have five times the vapour resistance of the material on the outside (cold side). Without using a very high resistance material such as polyethylene or foil-backed board, this can be achieved with a suitable vapour-check layer on the warm side of the insulation. This layer slows down the passage of moisture to a safe level.
The construction also needs to be airtight on the inside to ensure the vapour-check layer works as intended. So it’s important to not put gaps in the vapour check layer for services (wires, etc), and instead have a thin space for these services between the vapour check and the internal finish (e.g. plasterboard). The final layer of external cladding might be waterproof (such as tiles) but there must be a ventilated gap between this and the sheathing board that actually completes the breathable construction.
In a UK-type climate the interior of a house usually has a higher relative humidity (RH) than the outside because it contains people exhaling, cooking, and washing. It’s a very general rule that, left to themselves, things will always migrate from an area of higher concentration to one of lower concentration, so there will be movement of water vapour towards the outside (or, to be more technical, the interior has a higher vapour pressure).
At times of high interior RH, water vapour will enter the walls, lowering the RH (both high and low RH cause problems and the ideal range is 40-60%). At times of lower interior RH, almost all of the water vapour will migrate back into the interior to be taken away by air currents. Any water vapour that might have managed to penetrate the wall deeply will be drawn out towards the exterior because of the lower permeability of the outer layers, so no harm done. Any water coming in from the outside will be unable to get very far as it is pushing through layers of decreasing permeability. The breathability of materials interacts with both temperature (which affects RH) and ventilation (one of whose functions is to carry away water vapour).
Condensation is due to excessive moisture, cold conditions, cold surfaces or inadequate ventilation. It can cause mould, heat loss and building damage. To address these issues, the room should be properly insulated and adequately heated (to keep the surfaces warm).
So do take all feasible insulation and draught-proofing options, and look into improving single glazing with either replacement glazing or with secondary glazing (a cheaper option).
Condensation may still occur on replacement windows, as they’ll still be the coolest surface. New windows will be more airtight than old ones, so warm moist air will be no longer be escaping through cracks in the frame and around the seals. This means that existing damp issues may become more pronounced. Many windows will include trickle vents in the frame, to allow a small amount of ventilation, but to keep the house warm and dry you may need to take a few other measures to avoid producing lots of moist air.
Drying clothes indoors can easily cause problems of damp and condensation, leading perhaps to mould, etc. So if you need to dry indoors, it should be in a room that can be shut off and ventilated (perhaps with heat recovery, as mentioned below).
The bathroom and kitchen in particular should be able to be ventilated in a controllable way, to stop moist air circulating into the rest of the house. For example, after a shower or bath, leave the bathroom door shut and the window open for a while until moist air & condensation on the window/mirror has cleared. Do the same when cooking if you can; if your home has an open plan layout at least stop the moist air circulation where possible (e.g. to the upstairs rooms).
To avoid heat loss from a room like a kitchen or bathroom, where lots of moist air is regularly produced, you could consider a heat recovery extractor fan. It may be worth getting a slightly bigger heat-recovery fan unit than you need, as they can be a bit noisy if they are operating on full power. This may be fine if are just switching it on for a short while to clear the bathroom, but it could be obtrusive in the kitchen. If a fan unit is not supplied with more solid covers over the plastic slatting, it could be worth fitting something if you live in a house that is a bit exposed to the wind (as they could let in draughts when not in use). An openable wooden casing could be fitted quite easily.
If drying clothes indoors is not an issue, and you’re already careful about venting away moisture from bathroom & kitchen, then excessive condensation may be from some other cause, such as a water leak somewhere (e.g. from a pipe under the floor or in the loft), or water penetrating the structure from outside (such as rainwater coming in cracks in masonry, or if gutters are broken). If problems persist, it would be worth investigating these issues, as over time they’ll cause damage to the building.
A damp proof course (DPC) is a layer of material between the foundation and the rest of the building which prevents water from getting into the building fabric. Traditionally these were two overlapped layers of slate or lead, but some old buildings do not have them at all. Modern buildings tend to use DPCs based on bitumen or polythene (perhaps recycled plastic), and they’re standard and cheap to fit at the construction stage. For a timber frame building with minimal foundation you will only need a small amount of DPC material. A DPC is important for this type of construction because timber can soak up moisture and will rot if not able to dry out easily.
Do I need to add a damp proof course to my old house?
There is a concern that you must fit a DPC to satisfy your mortgage company. However, many won’t actually insist on this for an older property if there’s no evidence of a damp problem. There are several possible causes of damp and if you can identify the cause and solve it, perhaps with some feedback from a professional, this is often enough.
‘Rising damp’ is often just a catch-all term for damp issues that could be solved in other ways. Whereas retrofitting a chemical DPC can turn out to be a waste of money, quite apart from the environmental impact of the chemicals. If it doesn’t solve the problem you may find that you’re not covered by the guarantee. A subsequent drill test which shows that there’s no ‘rising damp’ could be taken to indicate that the DPC worked and you just have a different problem – despite this other problem probably being the case all along!
So what should I do?
First check your roof, gutters, pointing and ground levels (or get a professional to do this). Drainage around a building is important. If possible, dig out anywhere where the ground level is higher outside than in. In some cases, digging down 200-300mm and putting in stones or gravel will help drainage around the site. Fixing these problems will cure most damp problems.
Another possible cause of damp is condensation, which generally occurs on the coldest surfaces. This can be lower down walls, so looking like ‘rising damp’. To address condensation your home needs to have adequate insulation, heating and ventilation. See our information pages on these topics for more advice.
If walls have been affected by long term damp, then even when the problem has been solved it will usually involve re-plastering internally. This is because the original plasterwork will be affected by hygroscopic salts, which could result in continued damp problems. A building may take a year to dry out.
What if there are still damp problems?
There can be a problem if a DPC has been bridged – for example with render. Water can potentially move up the render where it can’t move up the brickwork or masonry. This could also cause problems with frost damage. A DPC must extend through the full thickness of the wall, including pointing, rendering or other facing materials.
When retro-fitting a DPC in an older property make sure that any original lime-based plaster or render that was removed gets replaced with the same sort of material. Lime-based materials are breathable and flexible, unlike strong cement renders. The latter can cause serious cracking problems where the old plaster meets the new.
To accurately test for moisture a company would need to do proper testing, such as a drill test (possibly time consuming and costly), rather than just using a damp meter. If you’re convinced you have rising damp then get a proper drill test done by an independent local surveyor.
Further information is available in this article on the misdiagnosis of rising damp and solutions to damp problems, written by Tim Hutton. See also Abbey Independent Surveys and Mike Parrett, who has investigated thousands of buildings without finding rising damp. In every case, damp was attributable to something else.
The U-value is a measure of how many watts (representing the rate of flow of energy) pass through one square metre (m²) of a construction detail (such as a wall) for every degree difference in temperature between the inside and the outside. Temperature is measured in kelvin, and 1K = 1°C (degree centigrade).
As an example, a U-value of 6.0W/m²K for a single glazed window means that six watts will be escaping through each square metre of glass when the temperature difference is one degree. If it is 20°C in the house and 0°C outside, then the heat loss is 20 x 6 = 120 watts per square metre.
U-values are generally used to describe the thermal performance (heat loss) for a section of construction that involves several materials – such as a wall made up of timber, insulation, board & render.
Thermal conductivity
For individual materials, such as a type of insulation, you’ll come across the term ‘thermal conductivity’, also known as a k-value or λ-value (lambda). This is the rate at which heat flows through a particular material, and good insulation will have a low thermal conductivity. It is measured in watts (heat flow) per metre (depth of material) per degree difference (inside to outside), so the unit is W/mK.
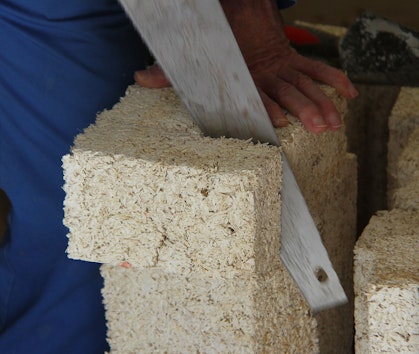
Most natural insulation materials (hemp, wool, recycled paper or textile) will have a thermal conductivity of about 0.035 to 0.040 W/mK, which is similar to the performance of conventional mineral wool insulation. Foil-backed plastic foam insulation boards are slightly better, with thermal conductivity about 0.023 W/mK. So about 100mm of the plastic foam board will give equivalent insulation value to about 150mm of the various woolly types.


WANT TO LEARN MORE?
Come on one of our practical eco-renovation short courses.

Did you know we are a Charity?
If you have found our Free Information Service useful, why not read more about ways you can support CAT, or make a donation.
Email Sign Up
Keep up to date with all the latest activities, events and online resources by signing up to our emails and following us on social media. And if you'd like to get involved and support our work, we'd love to welcome you as a CAT member.
Follow us


