Build a nest box for birds
Create a cosy place for your feathered neighbours to nestle up this winter by building a nestbox for the birds.
It’s not just us that want a cosy place to cuddle up in during winter. Creatures big and small need a safe, warm, dry space to shelter in on the coldest days but you don’t need lots of materials to provide this, you just have to be a bit untidy! Let patches of your garden grow wild. Long grass, piles of leaves and compost heaps all make great winter homes for wildlife.
If you do want to get creative this winter why not build a nest box for birds using the instructions below. You’ll need an adult to help you throughout this activity.
You will need
- A plank of FSC wood 15cm wide x 1.4m long x 1.5-1.8cm thick and not pressure treated
- Pencil and tape measure
- Saw
- Nails
- Strip of waterproof rubber
- Drill
- Optional: a hole saw/cutter for making 3.2cm holes
- Ladder
- Screws
- Non-toxic art materials
- An adult to lend a hand
Step 1
Find the perfect spot for your box. Your box will need a sheltered, quiet spot around 3m off the ground and to be north/east facing to protect it from ground predators, too much sunlight or rain.
Step 2
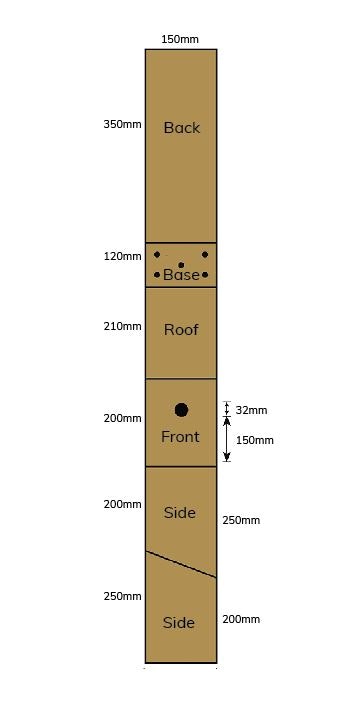
Measure and cut your timber to the right size as shown (you might need to ask an adult to help here). If you haven’t got a hole cutter to make a 3.2cm “front door” hole you can use a jigsaw (not the puzzle) to cut a square of the same size.
Step 3
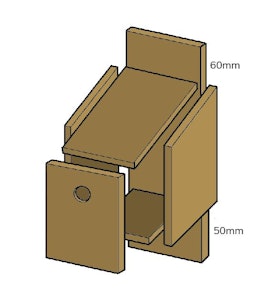
Nail all the pieces together except the roof. The back, front and sides should wrap around the base.

Step 4
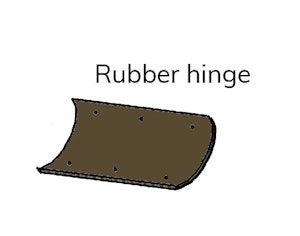
Attach the roof. You’ll need to open the box at a later stage to clean it out so attach a waterproof strip to make a hinge using screws between the top edge of the roof and the backing board. Try a piece of bicycle tyre inner tube, damp-proof membrane or roofing felt.

Step 5
Get creative. You should now have a complete nest box that you can decorate any way you want, but don’t forget to use non-toxic art materials.
Step 6
Install your box. Drill guide holes in the backing plate at the top and bottom of the box then – taking care – you can fix the box in place using a ladder, screws and rawlplugs (if needed).

EMAIL SIGN UP
Keep up to date with all the latest activities, events and online resources by signing up to our emails and following us on social media.

